Twisty Balance Flow

In vinyasa or hatha flow classes, the magic comes as much from how you sequence the poses as from the poses themselves. I picked up this flow from Elizabeth, one of my favourite teachers in San Francisco. To get the full benefit of the postures, make sure to hold each one for three to five breaths.

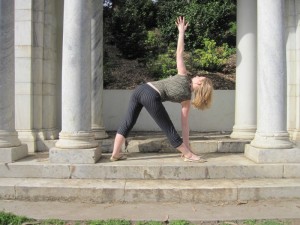
Start in triangle pose (trikonasana), making sure both sides of the torso (even the bottom side) are long. You can look down, to the side, or up, but really extend forward through the crown of the head. Think about rolling your top hip back. Breathe.

Triangle

Start in triangle pose.

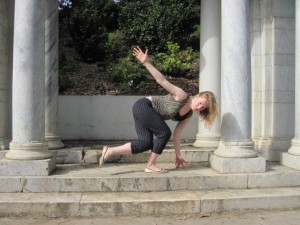
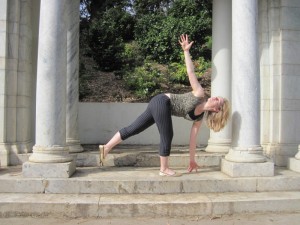
Prepare for revolved triangle (Parivrtta Trikonasana). As you exhale, bring the top hand to the ground or a block. As you inhale, take the other hand to the hip or extend it skyward, revolving the chest toward the front inner thigh. Keep both sides of the torso long. The head can look down, forward, or up. Breathe here.
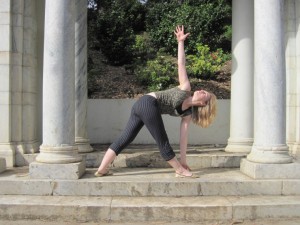
Revolved Triangle

As you exhale, bring the top hand down to the ground or a block. As you inhale, extend into revolved triangle.

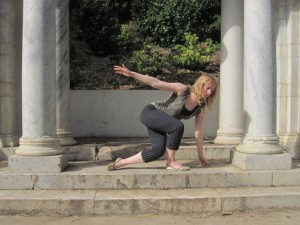
Prepare for revolved half moon (Parivrtta Ardha Chandrasana). Slightly bend the front knee and begin to shift the weight forward. Contract the abdominals and as you inhale, lift the back foot off the ground.

Transition from revolved triangle to revolved half moon

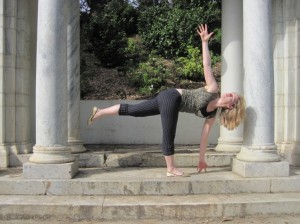
As you inhale, begin to lift into revolved half moon.

Keep the torso revolved; eventually the front of the chest may be completely perpendicular to the ground. The bottom hand can be on the floor or on a block, and the top hand can be on the top hip, or extended skyward. Try to get the back leg parallel to the ground with the foot flexed. Breathe.

Revolved half moon

Revolved half moon.

Prepare to transition to sitting. Contract your abdominal muscles, and as you exhale, bend into both knees. Bring the top knee behind of the bottom ankle, and sit down between the feet.

Transition to seated

As you exhale, transition from revolved half moon to a seated preparation for half twist.

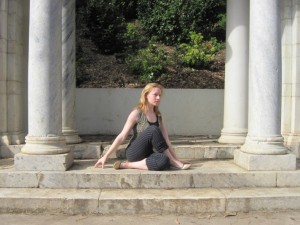
Make sure both sit bones are rooted, preparing for half twist (Ardha Matsyendrasana). As you exhale, turn the chest toward the top knee and place the back hand behind you. Inhale extend the other hand skyward, and then take the hand or elbow to the knee.

Seated preparation for twist

Prepare for half twist.

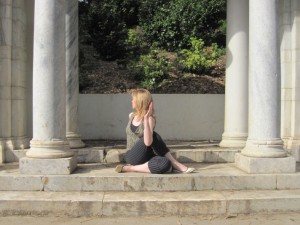
As you inhale lengthen upwards through the spine, as you exhale twist. Don’t only think about turning the head and eyes back, think about rotating the whole chest. Breathe here.

Half Twist.

Inhale lengthen upwards through the spine, exhale twist.

As you inhale, return the torso back to neutral, and prepare to return to a standing balance. Ground down through the foot of the top leg. Contract the abdominals, and as you inhale, begin to straighten that top leg leg and lift the other leg off the ground.

Return to standing

Inhale, return to standing.

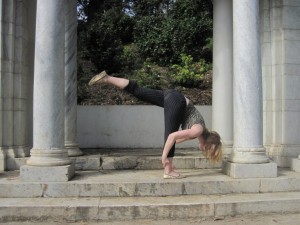
Transition into standing splits (Urdhva Prasarita Eka Padasana). It’s tempting to roll one hip higher than the other, but try to keep the hips square to the floor. As you inhale, lift the back leg up as high as possible while keeping the hips in alignment. If you have the flexibility, as you exhale, draw the chest in toward the quadriceps (front on the thigh). The hand can be on a block or on the floor, or you can have one hand or both grasping the ankle to challenge balance. Make sure to keep breathing.

Standing splits

Inhale, lift the back leg upwards. Exhale, gently pull the chest in toward the thigh.

I’ll let you decide where to go from here, but make sure you make your way to the other side to balance it out. For example, in a vinyasa class you could release half splits into a forward fold, step/hop back to chuttarunga and cycle through a vinyasa (upward facing dog, downward facing dog). From downward dog, you could then step forward into a lunge, giving you an easy transition into triangle pose on the other side. For the most balanced overall routine, you should make sure to enter triangle in the same way on both sides.
Monkey Tail

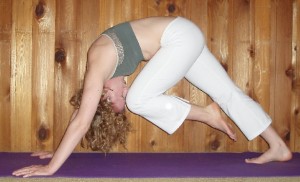
There are quite a few variations on hip flexion and extension flows from down dog. Here’s one called Monkey Tail. Start in Downward Facing Dog. As you inhale, lift one of the legs up toward the ceiling, bending into the knee as you lift. As you do this, pull the chest bone towards the front of your mat and look forward. Pay attention to the low back as having the knee bent makes it easy to arch the back too far. If you feel any discomfort, back off. As you lift the leg, head, and chest, you build strength and flexibility in the muscles along the whole spine.

Inhale lift the leg

Inhale, lift the leg

As you exhale, bring the knee in toward the nose, and nose in toward the knee. As you do this, you continue to work the low back muscle, and as you complete the crunch, you use your abdominal muscles as well.

Exhale, knee in toward to nose, nose toward the knee.

Exhale, knee in toward to nose, nose toward the knee.

Repeat for anywhere from 3-12 breaths, depending on how you’re fitting it into your practice. Make sure you balance it out on the other side!

Flying Crow

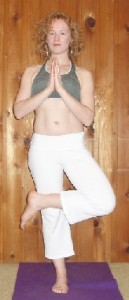
Variation on tree.

Variation on tree.

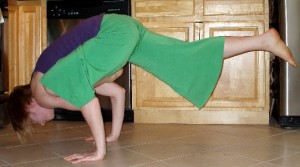
Once you’ve mastered crow pose, give flying crow (eka pada galavasana) a shot. It is important to have a good handle on crow first so that you know how to make micro-adjustments to stay balanced on your hands. Crow is much easier to escape from than flying crow if you start to fall.

When I teach this in my yoga classes, I usually transition into flying crow from a variation on tree. This gives people the option to stay in tree if that is a more useful balancing posture for them. So let’s start there. Begin in a variation on tree pose with your ankle crossed over the centre of the opposite thigh.

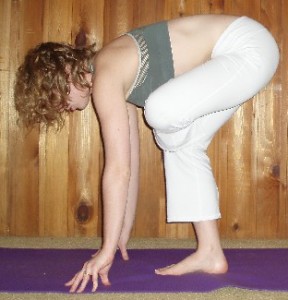
Bring the hands to the floor.

Exhale, forld forward and bring the hands to the floor.

Contract the abdominals, low back, and pelvic floor, and as you exhale fold forward, bringing the hands down to the mat. It is okay to bend into the knee of your supporting leg.

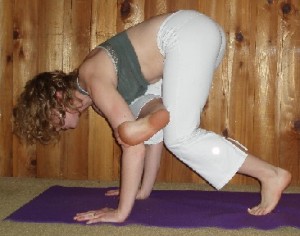
Now, bend into the elbows. Form a shelf with your tricpes (these are the muscles in the back of your upper arms). This shelf is the foundation of your posture; this is where the shin of your front leg is going to sit. The stronger your foundation, the more likely you’ll be able to stick the posture, so don’t let the elbows collapse inwards or outwards: the arms should stay parallel. Bring the shin to the triceps. You may need to hop the back foot farther back.

Bring the shin to the triceps.

Bring the shin to the shelf created by the triceps.

Like most arm balances, you don’t need to hop or jump to get into flying crow. Contract the chest and upper back muscles to keep the elbow from bowing out to the sides. Contract the abdominals, you’ll need them to maintain balance. Now, slowly bend into the elbows and reach the chest bone forward until your back foot floats off the floor. The slower you go, the easier it is to stick the arm balance. If you enter the posture with a lot of forward momentum it’s harder to stop right at that perfect balance point, and you’re more likely to fall forward onto your head. Also, try to look forward while you’re in this posture. Looking down or back toward the legs makes you more likely to roll forwards.

Shift the weight forward until the back foot floats off the floor.

Shift the weight forward until the back foot floats off the floor.

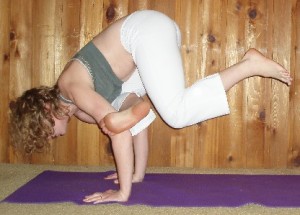
The last step is to slowly extend the back leg. Again, move slowly so that you don’t have to compensate for big changes all at once. For every change you make with that back leg, you have to adapt your foundation to maintain balance. Keep looking forward, keep the arms parallel, and keep the abdominals, low back, and pelvic floor contracted. Breathe.

Slowly extend the back leg.

Slowly extend the back leg.

Supported Bridge

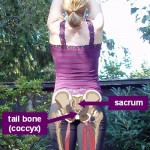
I picked up this variation on setu bandhasana in a restorative yoga class I attended in San Francisco a while back. Before you get started, you have to figure out where your sacrum is. Your sacrum is the part of your spine that acts as the posterior (back) wall of your pelvis. The spine is made up of bones called vertebrae that are stacked one on top of the other, but in the sacrum these bones become fused. So, if you feel down your spine in the low back, you’ll feel the bump of each vertebra, but when you get to the sacrum (in the back of the pelvis), the bumps will become much less pronounced. The very end of the spine, just inferior to (below) the sacrum is the coccyx, or tail bone.

The sacrum is above the tail bone.

The sacrum acts as the back wall of the pelvis. It is above the tail bone.

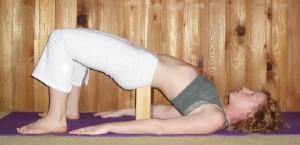
The instructions for this posture are pretty simple. Make your way into setu bandhasana (bridge pose), and then slide a block under the sacrum. Make sure that the block isn’t underneath the low back or tail bone, these areas are not as stable as the sacrum. Remember that yoga blocks can have three different heights, depending on which side you put them on, to accommodate different levels of flexibility. Make sure you put the block in the best orientation for your body. The low back is susceptible to injury, so you do have to be careful here. Avoid getting in the habit of sustaining pain in the low back. Even if you don’t get injured during your yoga practice itself, you will carry this habit into the rest of your life where there are less controlled situations, and the chance for injury is much greater.

Supported bridge

Supported bridge.

If you feel comfortable in this posture there is another variation you can take: lengthen out the legs, placing the feet closer to the end of your mat. You may need to readjust the block to make it more comfortable. This deepens the bend in the low back, so make sure you return to the previous variation or change the orientation of the block if you feel any discomfort. If you want to add a little more length, extend the arms in the opposite direction, reaching out past the top of your mat.

Legs extended

Supported bridge with legs extended.

This pose improves flexibility in the spine, and stretches the hip flexors (muscles in the front of the hip) and abdominals (stomach muscles).

Wild Thang

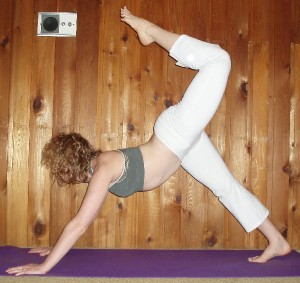
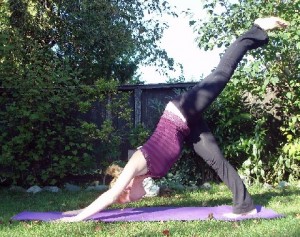
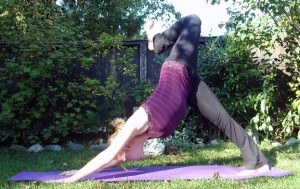
Here’s an interesting hip-opening sequence you can take from downward facing dog. First, as you inhale, lift one of the legs upwards. This position builds strength in the lower back, glute (butt), and hamstring (back of the thigh) muscles. For some of you, it will be most appropriate for you to stay here to develop your strength and flexibility.

Three-legged down dog

Three-legged downward facing dog.

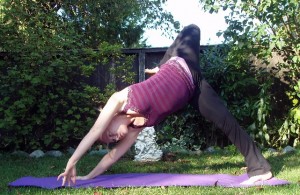
If you can comfortably raise your leg above above the height of the hips, you can turn this into a hip-opener: on your next exhale, bend into the knee and let the heel relax across to the opposite side of the body. You should feel a stretch in the hip flexors (muscles in the front of the hip) of the lifted leg. Make sure you keep the abdominals contracted to protect the low back.  This is a really nice hip opener if you have the flexibility to get here.

Dog dog hip opener

Bend into the knee and let the heel relax across to the opposite side of the body.

Some points of debate:

  • some teachers say to keep the foot flexed, rather than just relaxing it. I’m not sure exactly what the justification is, but does seem to add integrity to the posture.
  • As shown in the image above, I suggest you keep your chest squared to the floor (as much as possible), just like you would in downward facing dog; however, some teachers suggest you look out under the armpit (the one of the same side as the leg you’re lifting). Letting your torso twist in the direction allows you to get your leg farther across the body, which will allow gravity to do a little more work for you, and pull the leg into a deeper hip flexor stretch. The problem with this variation is it’s very easy to compromise the low back. If you do it this way, make sure you’re keeping the abdominals contracted and monitoring the low back.

If you know that you are comfortable with back bends, you can “flip the dog” into wild thing. But seriously, you have to be sure you can handle it, because there’s a point of no return in the transition–after that point you’ll continue all the way into wild thing, whether your body likes it or not. Staying in the previous posture is a really nice hip opener for those of you without an advanced back bending practice.

I don’t think there’s a better way to put this in words than by telling you to contract the abdominals, keep it under control, and “flip the dog” as you exhale.

Flip the dog.

Beginning to flip the dog...

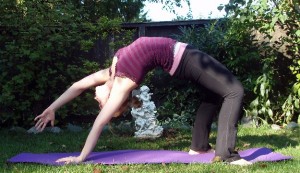
The foot of the bottom leg rotates so the toes point toward the back of the mat. As the belly turns skyward, the foot of the top leg continues down to the mat. The soles of the feet end up flat on the mat. The hand that lifts (the one on the same side as the lifted leg) is going to stay lifted and extend toward the front of the mat. You are now in wild thing. Does everything feel… groovy?

Wild Thing

...ending up in wild thing.

In wild thing, make sure you keep the low back muscles contracted to support your pose. Keep the abdominals contracted to control the arch of the back. To explore your flexibility, think about contracting the quads (the muscles in the front of the thighs). This will begin to straighten the knees and raise the hips up higher.

To get out of wild thing, just follow the steps in reverse. Contract the abdominals and inhale as you flip back to downward facing dog.