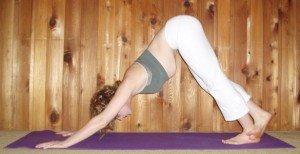
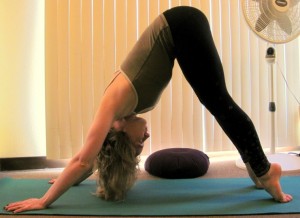
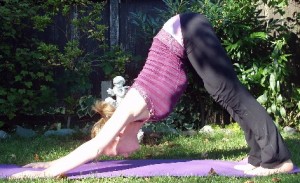
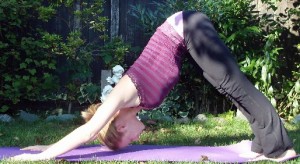
I used to come out of Bikram yoga classes with such tight calves. Balancing requires the lower leg muscles to work together to stabilize the ankle, and the standing series would completely exhaust my already tight muscles. I asked the teacher why there were no poses in Bikram yoga to stretched the calves, and he said there actually were. He gave head to knee pose as an example, which is a seated pose in which you fold forward over a lengthened leg. The calf stretch comes from using the hands on the ball of the foot to lift the heel off the floor and pull the toes back toward the face. I think calling head to knee pose a calf stretch is a misnomer, considering only the the most flexible students could ever reach the point where the pose actually stretches the calves. Similarly, many yoga teachers use downward facing dog as a calf stretch when many students’ other muscles are so tight that they can’t get enough downward force through the heal to feel anything in the calves. Tight lower leg muscles can cause shin splints, knee problems, and foot problems, so it is important that achievable lower leg stretches are incorporated into yoga classes.
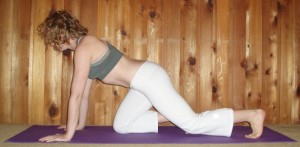
Gastrocneumius stretches. The gastroc is the big meaty muscle in the calf, and it is stretched when the leg is lengthened and the foot is flexed. A gastroc stretch that doesn’t require too much flexibility in other muscles can be done starting from hands and knees. From there, extend one leg out behind, tuck the toes under on the floor, and extend actively out through the heel. You will feel the stretch in the calf.
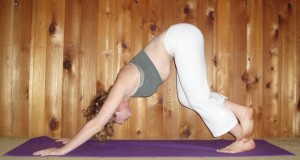
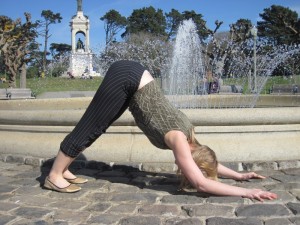
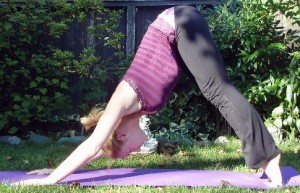
If you’re more flexible, you can go into a downward dog variation. From the previous position, press into the hands to lift the front knee off the mat. Lift the sit bones up without losing engagement in the core, and push down through the back heel. You can keep your front foot where it is for support or tuck it behind the ankle of the leg your stretching, increasing the stretch even more.
Soleus stretch. The soleus is another muscle in the back of your lower leg that runs underneath the gastroc. When you stretch it, you often feel it in the Achilles tendon area between the meaty part of your calf and your heel. It is stretched when the knee is bent and the foot is flexed. From the hand-and-knees position above bend into the back knee as you continue to press back through the heel, and you’ll feel the stretch move into you soleus.
Similarly, from the downward facing dog-like position, bend into the knee of the leg your stretching to move the stretch into the soleus.
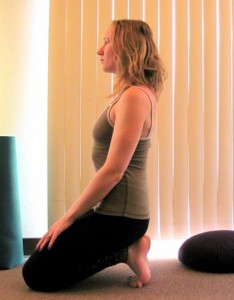
Toe-Flexors Stretch. Many of the muscles that control your toes are in your lower legs. The stretches above will stretch the toe-flexing muscles, but we can target them even more by bending the toes back. A friend of mine coaches swimming, and her swimmers always dread when she tells them it’s “social time” during their stretching session, because although that means they’re allowed to chat, it also means they have to sit in the following position for a couple minutes:
To get into this position, sit on the heels and tuck all ten toes under. If this bothers your knees, place a blanket or block in between your buttocks and heels so your knees don’t have to bend so deeply. This position feels like nothing at first, but give it a minute or two and the intensity will set in. You may feel the intensity in the soles of your feet as well as in your calves.
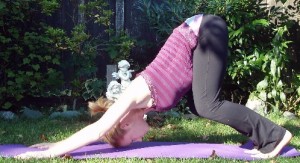
Tibialis Anterior and Toe Extensor Stretches. The often neglected tibialis anterior is located in the front of the lower leg, along with your toe-extending muscles. To stretch them, you have to point the foot and curl the toes. From a downward facing dog position, turn one foot over so that the top of the foot is pressing down into the floor instead of the sole. The legs can be slightly bent if that is more comfortable. Press into the hands to lift the hips up and back, increasing the stretch in the front of the lower leg. You can keep only one foot flipped, or you can turn both feet over to stretch both legs as the same time.
Hold each position for at least 20 to 30 seconds to allow to muscles to relax into the stretches.

