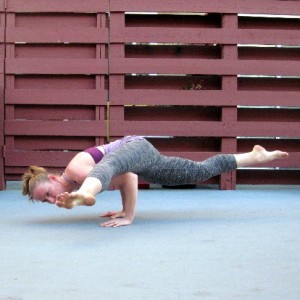
Half Hero Upward-Facing Bow Variation

If you’re comfortable in upward facing bow (also known as wheel or urdhva dhanurasana) and half supine hero pose, (ardha supta virasana) why not combine them?

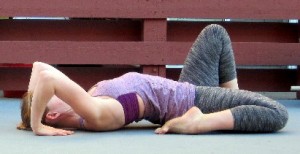
Begin in half supine hero. If you cannot get onto your back comfortably in reclined half hero, keep working with other comfortable modifications on half hero rather than going on to the variation described below.

Half Hero

Half Hero

Bend your extended leg so the sole of the foot in on the floor and the heel is underneath the knee (most people can graze the heel with the hand in this position).

Half Hero with Bent Knee

Half Hero with Bent Knee

Place the hands palms-down above the shoulders on the mat, fingertips pointed toward the shoulders. Breathe.

Half Hero Preparing to Life to Upward Facing Bow

Half Hero Preparing to Life to Upward Facing Bow

On an inhale use the strength of you arms and legs to lift up and place the crown of your head on the mat. The sole of one foot should be on the floor, and the top of the other should be on the floor. Take your exhale to readjust the hands and feet so that the thighs are hips-width apart with the knees and feet pointed straight toward the front (or back) of your mat, and so that the hands are shoulder width apart with fingers pointed toward the front of your mat.

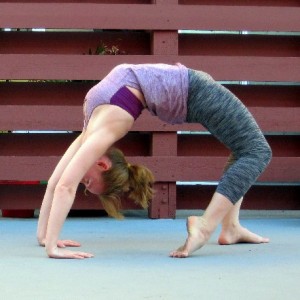
On your next inhale push into the hands and feet to lift all the way up into upward facing bow. Keep the thighs parallel, pressing into the big toe of the foot. To avoid letting the elbows wing out to the sides, draw them toward one another. As you lengthen into your arms and legs, send the tail bone toward the front of your mat and the chest toward the back of your mat to maintain length in your low back. Breathe.

Upward Facing Bow Half Hero Variation

Upward Facing Bow Half Hero Variation

To release, on an exhale, tuck the chin and bend into the knees and elbow to lower back into reclined half hero under control. Then, repeat on the second side.
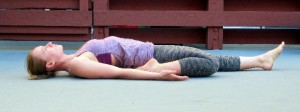
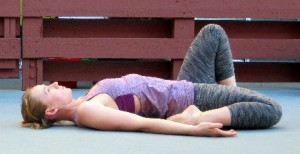
Dancing Cat

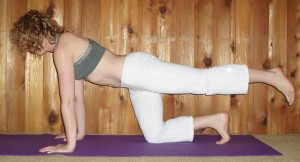
Dancing cat is a great way to strengthen low back muscles without hyper-extending the spine, which can be uncomfortable for many people. Start on all fours. As you inhale, extend your left leg behind you.

Leg extended

Inhale entend the leg out behind.

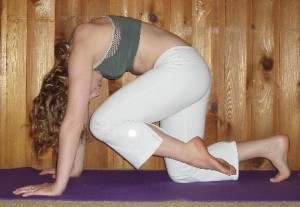
As you exhale, draw the knee toward the nose and the nose toward the knee underneath the body. Round the spine as if finding cat pose  to fire up the abdominals.

Knee to nose, nose to knee.

Bring the knee in toward the nose and the nose in toward the knee.

As you inhale, extend chest bone forward and the left leg back, noticing how your low back muscles contract.

Repeat this three to eight times, then switch sides.

Yoga For Cyclists

I recently taught a Yoga For Cyclists workshop at Mission Cliffs, and I wanted to put some suggestions out there for those of who couldn’t make it, and a refresher out there for those of you who did!

Cyclists tend to have short, tight chest muscles and tense, but overstretched, upper and lower back muscles from continually hunching over their handle bars (for more details on this, see my recent blog post on getting to the root of upper back tension). To stretch the chest muscles and give the upper back muscles a chance to relax, try this prone shoulder opening twist. To strengthen upper and lower back muscles, try locust pose.

Cyclists can develop tight hips, which may contribute to lower back soreness. To stretch tight hip flexors, quads, and hamstrings, consider moving through the following sequence on both sides, holding each of poses for at least thirty seconds:

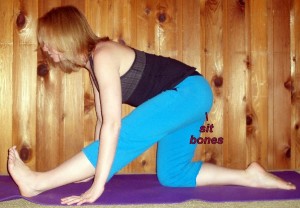
Sit bones tilted back

Half splits.

To stretch the outer hip muscles try pigeon pose or thread the needle. It is important to stretch the outer hip muscles as these muscle can contribute to tension in the IT band (a long strap of connective tissue running from your hip to below your knee), which can cause problems in both the hip and the knee.

It is also important to maintain strong core muscles to have healthy form while cycling. As mentioned above, locust will help strengthen your low back. Holding plank pose will strengthen all the core muscles at once.

I hope that gives you some stuff to try at home for now. I will be offering the Yoga For Cyclists workshop again soon at Mission Cliffs, so keep your eyes out for it!

Full Bird of Paradise

Easy bird of paradise seems to come up relatively frequently in the classes I attend, but I don’t often see full bird of paradise, so I thought I’d offer it to you.

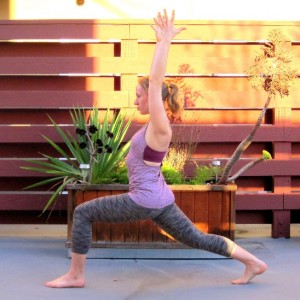
Begin in high lunge, with you left leg forward and right leg back. Make sure you left knee is right above the ankle, and the knee is pointed in the same direction as the toes. The back leg should be extended and strong, so press back through the right heel. As you lift up through the crown of the head, root the tail bone down, draw the front ribs toward the navel, and bring the shoulder blades down the back.

High Lunge

High Lunge

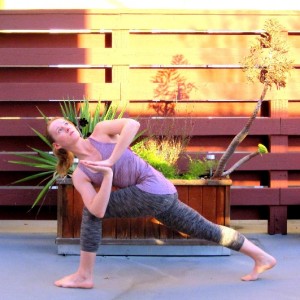
On you next exhale, come into revolved high lunge: twist to your left and bring the right elbow to the opposite side of the left knee. This may be as far as you go, and that’s okay!

Revolved Lunge

Revolved High Lunge

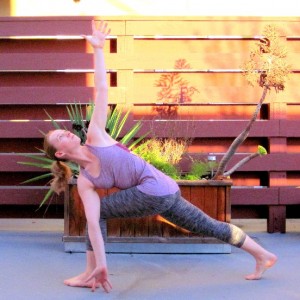
If it’s available to you, keep the right elbow outside the left knee and extend the right fingers down toward the floor, left finger tips skyward. Breathe.

Extended Revolved Lunge

Extended Revolved Lunge

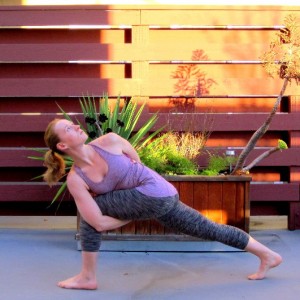
From there, if you have the arm length and flexibility, you can bring the right arm under the left thigh and the left arm over the low back to bind your hands together underneath the body. You may use a strap to supplement.

Binded Revolved Lunge

Binded Revolved Lunge

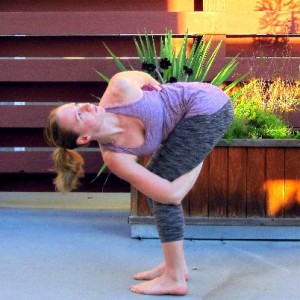
Take a deep inhale, and then as you exhale, step the right foot to the front of your mat, under control, so that the feet are side by side. Maintain your bind and breath.

Revolved Forward Fold with a Bind

Revolved Forward Fold with a Bind

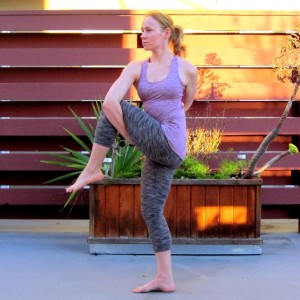
Root into your right foot, and on an inhale, slowly begin to lift the left foot off the mat, coming to standing upright. Allow the chest to twist the the left, and let the eyes follow or look out past the back of your mat.

Full Bird Preparation

Full Bird Preparation

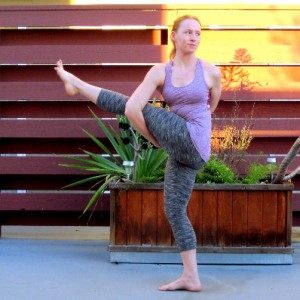
If it’s available to you, straighten the left leg. Breathe.

Full Bird of Paradise

Full Bird of Paradise

To exit, rebend the left knee and gently lower the left foot back down to the floor. Release the bind and repeat the sequence on the other side.

Scissors

The other day in class, someone asked me if we could do “I don’t know what it’s called… ‘scissors?'” and gave me a quick demo.
“Oh!” I said, “You mean Eka Pada Koundiyanasana II”
“Yeah… what does that translate to?”
“Errr… let’s just call it scissors” (For those of you who are interested, it is usually translated to “Pose Dedicated to the Sage Koundinya II”–which is actually more of a mouthful than the Sanskrit name!)

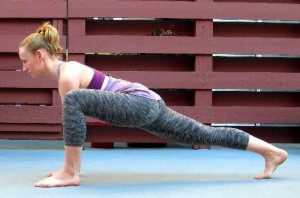
An arm balance by any other name would feel just as empowering, so let’s just call it scissors and move on! Begin in lizard with the left leg forward and the right leg back, both hands are on the big toe side of the front foot. Keep the front  knee bent right above the ankle. Keep the back knee lifted, lengthening the back leg and pressing back through the heel.

Lizard

Begin in Lizard.

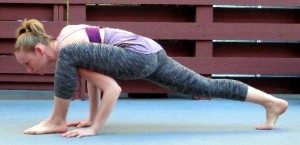
If you feel a deep stretch, stay right here and enjoy it! If you’d like to go further, bend into the elbows, and bring the left arm underneath the left knee. Keep hugging that left thigh in toward the midline of your body. The closer you can get to drawing your shoulder underneath the thigh, the easier it will be to hold your arm balance. Now, plant the hands underneath the shoulders and draw the elbows toward one another. Your right elbow can either nestle in under the right hip to help support your body weight, or it can stay to the side of the hip for more of a challenge. As with any arm balance, keeping the arms parallel is key; if you let the elbows bow out to the sides, you will lose your support and fall out of the arm balance.

Eka Pada Koundinyasana II Prep

Draw the left shoulder underneath the left knee, sliding the left hand leftward.

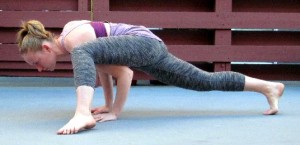
Keeping the arms as they are and the left knee drawing in toward the midline, heel-toe the left foot to the left. You want to rotate the leg so that the big toe side of the foot is on the floor, and the inner thigh is resting on top of the upper arm. If you keep the hamstring (back of the thigh) on the upper arm, it becomes difficult to get into this posture without substantial flexibility.

Eka Pada Koundinyasana II Prep

Heel-toe your left foot to the left, rotating the left inner thigh onto the back of the upper arm.

Now bend deeply into the elbows, draw the chest way out in front of the hands, and turn your gaze the left. If you shift the weight far enough forward, the back foot will gently float off the floor. Keep the back leg strong, pressing out through the ball of the foot and spreading through the toes. When you first experience this arm balance, your face may come quite close to the floor. As you become more stable, work on lifting up through the chest and drawing the shoulders back.

Eka Pada Koundinyasana II with Knee Bent

Bend the elbows deeply and shift the weight forward until the back foot floats off the floor.

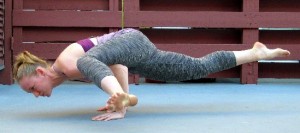
Once you become stable here, extend the left leg forward. Keep both legs strong, reaching out in opposite directions, to keep integrity in your arm balance. Keep your breath flowing and see if you can relax the face.

Eka Pada Koundinyasana II

Straighten into the front leg for full Eka Pada Koundinyasana II.

Gently release back to lizard and switch sides to prepare for “scissors” with the right leg forward.