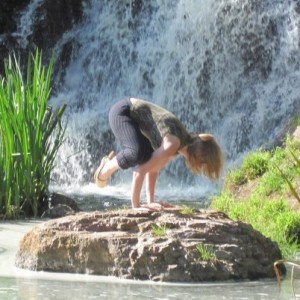
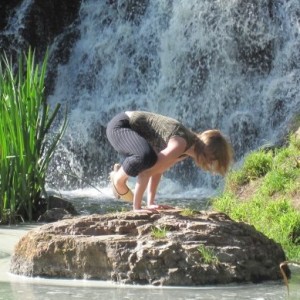
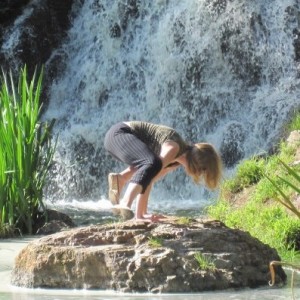
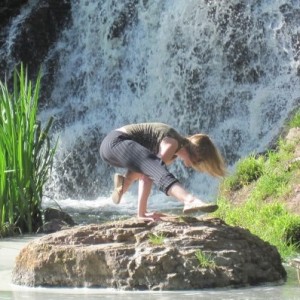
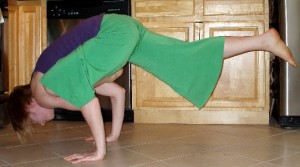
Scissors

The other day in class, someone asked me if we could do “I don’t know what it’s called… ‘scissors?'” and gave me a quick demo.
“Oh!” I said, “You mean Eka Pada Koundiyanasana II”
“Yeah… what does that translate to?”
“Errr… let’s just call it scissors” (For those of you who are interested, it is usually translated to “Pose Dedicated to the Sage Koundinya II”–which is actually more of a mouthful than the Sanskrit name!)

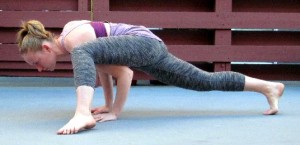
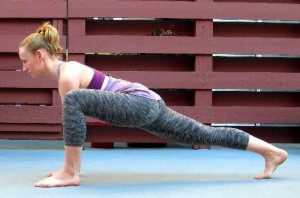
An arm balance by any other name would feel just as empowering, so let’s just call it scissors and move on! Begin in lizard with the left leg forward and the right leg back, both hands are on the big toe side of the front foot. Keep the front  knee bent right above the ankle. Keep the back knee lifted, lengthening the back leg and pressing back through the heel.

Lizard

Begin in Lizard.

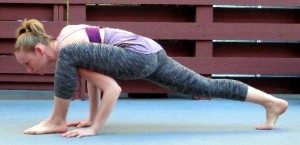
If you feel a deep stretch, stay right here and enjoy it! If you’d like to go further, bend into the elbows, and bring the left arm underneath the left knee. Keep hugging that left thigh in toward the midline of your body. The closer you can get to drawing your shoulder underneath the thigh, the easier it will be to hold your arm balance. Now, plant the hands underneath the shoulders and draw the elbows toward one another. Your right elbow can either nestle in under the right hip to help support your body weight, or it can stay to the side of the hip for more of a challenge. As with any arm balance, keeping the arms parallel is key; if you let the elbows bow out to the sides, you will lose your support and fall out of the arm balance.

Eka Pada Koundinyasana II Prep

Draw the left shoulder underneath the left knee, sliding the left hand leftward.

Keeping the arms as they are and the left knee drawing in toward the midline, heel-toe the left foot to the left. You want to rotate the leg so that the big toe side of the foot is on the floor, and the inner thigh is resting on top of the upper arm. If you keep the hamstring (back of the thigh) on the upper arm, it becomes difficult to get into this posture without substantial flexibility.

Eka Pada Koundinyasana II Prep

Heel-toe your left foot to the left, rotating the left inner thigh onto the back of the upper arm.

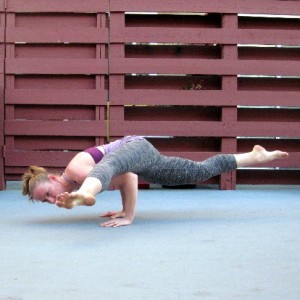
Now bend deeply into the elbows, draw the chest way out in front of the hands, and turn your gaze the left. If you shift the weight far enough forward, the back foot will gently float off the floor. Keep the back leg strong, pressing out through the ball of the foot and spreading through the toes. When you first experience this arm balance, your face may come quite close to the floor. As you become more stable, work on lifting up through the chest and drawing the shoulders back.

Eka Pada Koundinyasana II with Knee Bent

Bend the elbows deeply and shift the weight forward until the back foot floats off the floor.

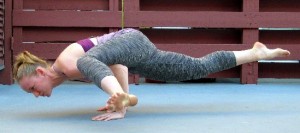
Once you become stable here, extend the left leg forward. Keep both legs strong, reaching out in opposite directions, to keep integrity in your arm balance. Keep your breath flowing and see if you can relax the face.

Eka Pada Koundinyasana II

Straighten into the front leg for full Eka Pada Koundinyasana II.

Gently release back to lizard and switch sides to prepare for “scissors” with the right leg forward.
Eight Angle Pose

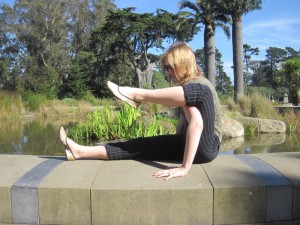
Despite how complicated and pretzel-y eight angle pose (astavakrasana) looks, it’s actually not that bad granted you have the flexibility to get your knee up high on your arm. Here’s how you get into it.

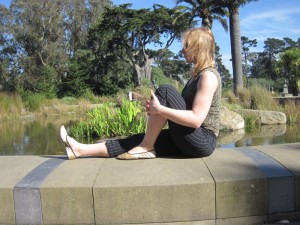
Start sitting in staff pose (dandasana) with the spine straight up and down, and the legs outstretched in front. From here, bend one knee into your chest.

Bend one knee in to your chest.

Bend one knee in to your chest.

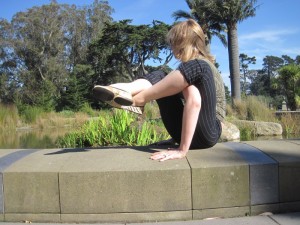
Here’s where the flexibility comes in. Thread the same-side arm under the bent knee, and try to get the knee as high up on the arm as you can. If you have the flexibility, you may get the shoulder underneath the knee. The higher you get the knee, the easier it will be to hold the full posture. This position can be a great hamstring and low back stretch, so if it’s enough for you, stay right here!

Get the knee up as high as you can on the arm.

Thread the arm under the knee, and get the knee up as high as you can on the arm.

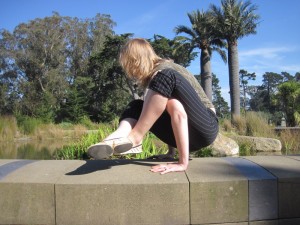
Here’s where it gets pretzel-y. Plant the hands firmly on the ground by your sides, and try to cross the ankle of your leg that’s currently straight over the ankle of your bent leg. Keep breathing.

Cross one ankle of the other

Cross the ankle of your straight leg over the ankle of your bent leg.

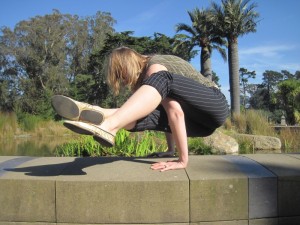
And now for the arm balance. Plant the hands on the ground underneath the shoulders. Squeeze the inner thighs toward each other and squeeze the ankles together. Contract the abdominals and as you inhale, begin to tip the weight forward to lift the hips off the floor. Make sure you don’t tip so far forward that the feet come down. Breathe. Stay strong in the arms so the elbows don’t bow out to the sides. This is a prep posture for the whole pose, so you may have to work on this for a while before you’re ready to move on to the full pose.

Lift the hips off the floor

Inhale, straighten the arms and lift the hips off the floor.

If you would like to go a little further, contract the abdominals, squeeze the legs toward each other, and extend the legs away from you on an inhale. Your breath is your guide: if you stop breathing you’ve gone to far.

Extend the legs away from you.

Inhale, extend the legs away from you.

Try to hold this for a few long slow breaths, and then balance it out on the other side.

One-Leg Crow Variation

There are at least two variations on one-leg crow (eka pada bakasana), but this is a good starter variation because it gives the “unused” leg a little more support, and doesn’t require as much back strength as sending the leg straight out behind. Because it gets you comfortable having one leg for support instead of two, it is a good prep pose for more challenging variations. Before exploring one one-leg crow, get comfortable with crow pose: make sure you can hold it for at least 8 breaths (which means you have to actually breathe as you hold it!)

Here we go: begin in crow. Make sure the abdominals are contracted, rounding the low back. Keep the gaze slightly forward on the floor to keep from toppling forward. Squeeze the heels up toward the buttocks. Breathe.

Crow

Crow Pose.

Normally in crow pose, you’d keep the hips up high, but in preparation for bringing the leg forward, exhale and lower the hips slightly. This will allow you to counter-balance better. Keep the abdominal muscles contracted.

Lower the hips.

Lower the hips.

Now, shift your weight into the leg that’s going to stay in the crow position. Use the inner thigh muscles to squeeze the inner knee into the triceps (muscles in the back of the upper arm). Feel the other leg get a little lighter. Contract the lower back muscles, outer hip muscles, and buttocks and, and on an inhale,  begin to slowly pivot this other leg around and forward. Try not to let the foot touch down. Keep the knee resting against the triceps as a pivot, and squeeze the inner thighs toward each other for more support.

Begin to bring the leg around.

Begin to bring the leg around and forward.

Keep breathing. Keep moving slowly: transitioning too quickly will throw you off balance. Use the chest and upper back muscles to squeeze the arms in toward each other. If the elbows bow out to the sides, you lose your base. As the leg comes around out front, contract the low abs, hip flexors (muscles in the front of the hips), and quads (muscles in the front of the thighs) to extend the leg forward. Breathe.

One-leg crow

One-leg crow

If you want a challenge, reverse the transition and return to crow, making sure to contract the core muscles and keep the breath flowing. From there, you can transition straight into the other side. Otherwise, from one-leg crow, you can let the feet float to the ground and take a break before returning to crow to do the other side.

Flying Crow

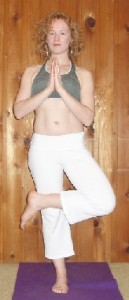
Variation on tree.

Variation on tree.

Once you’ve mastered crow pose, give flying crow (eka pada galavasana) a shot. It is important to have a good handle on crow first so that you know how to make micro-adjustments to stay balanced on your hands. Crow is much easier to escape from than flying crow if you start to fall.

When I teach this in my yoga classes, I usually transition into flying crow from a variation on tree. This gives people the option to stay in tree if that is a more useful balancing posture for them. So let’s start there. Begin in a variation on tree pose with your ankle crossed over the centre of the opposite thigh.

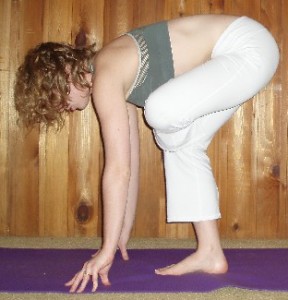
Bring the hands to the floor.

Exhale, forld forward and bring the hands to the floor.

Contract the abdominals, low back, and pelvic floor, and as you exhale fold forward, bringing the hands down to the mat. It is okay to bend into the knee of your supporting leg.

Now, bend into the elbows. Form a shelf with your tricpes (these are the muscles in the back of your upper arms). This shelf is the foundation of your posture; this is where the shin of your front leg is going to sit. The stronger your foundation, the more likely you’ll be able to stick the posture, so don’t let the elbows collapse inwards or outwards: the arms should stay parallel. Bring the shin to the triceps. You may need to hop the back foot farther back.

Bring the shin to the triceps.

Bring the shin to the shelf created by the triceps.

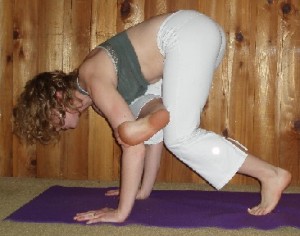
Like most arm balances, you don’t need to hop or jump to get into flying crow. Contract the chest and upper back muscles to keep the elbow from bowing out to the sides. Contract the abdominals, you’ll need them to maintain balance. Now, slowly bend into the elbows and reach the chest bone forward until your back foot floats off the floor. The slower you go, the easier it is to stick the arm balance. If you enter the posture with a lot of forward momentum it’s harder to stop right at that perfect balance point, and you’re more likely to fall forward onto your head. Also, try to look forward while you’re in this posture. Looking down or back toward the legs makes you more likely to roll forwards.

Shift the weight forward until the back foot floats off the floor.

Shift the weight forward until the back foot floats off the floor.

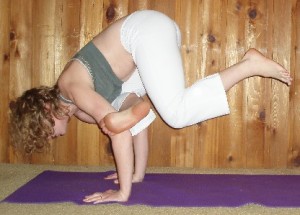
The last step is to slowly extend the back leg. Again, move slowly so that you don’t have to compensate for big changes all at once. For every change you make with that back leg, you have to adapt your foundation to maintain balance. Keep looking forward, keep the arms parallel, and keep the abdominals, low back, and pelvic floor contracted. Breathe.

Slowly extend the back leg.

Slowly extend the back leg.